Expense tracking allows for more accurate revenue management
By tracking expenses in Printavo, shops are easily able to manage and monitor their profit margins.
In this article we will cover:
- Creating expense categories
- Tracking per-job expenses
- Tracking high-level expenses
- Native expense analytics
Creating expense categories
Creating expense categories in Printavo can be done in just a few clicks. In fact, there are two ways to access the expense category management screen:
Regardless of how you get there, simply click "New Expense" to create a new expense category.
Tracking per-job expenses
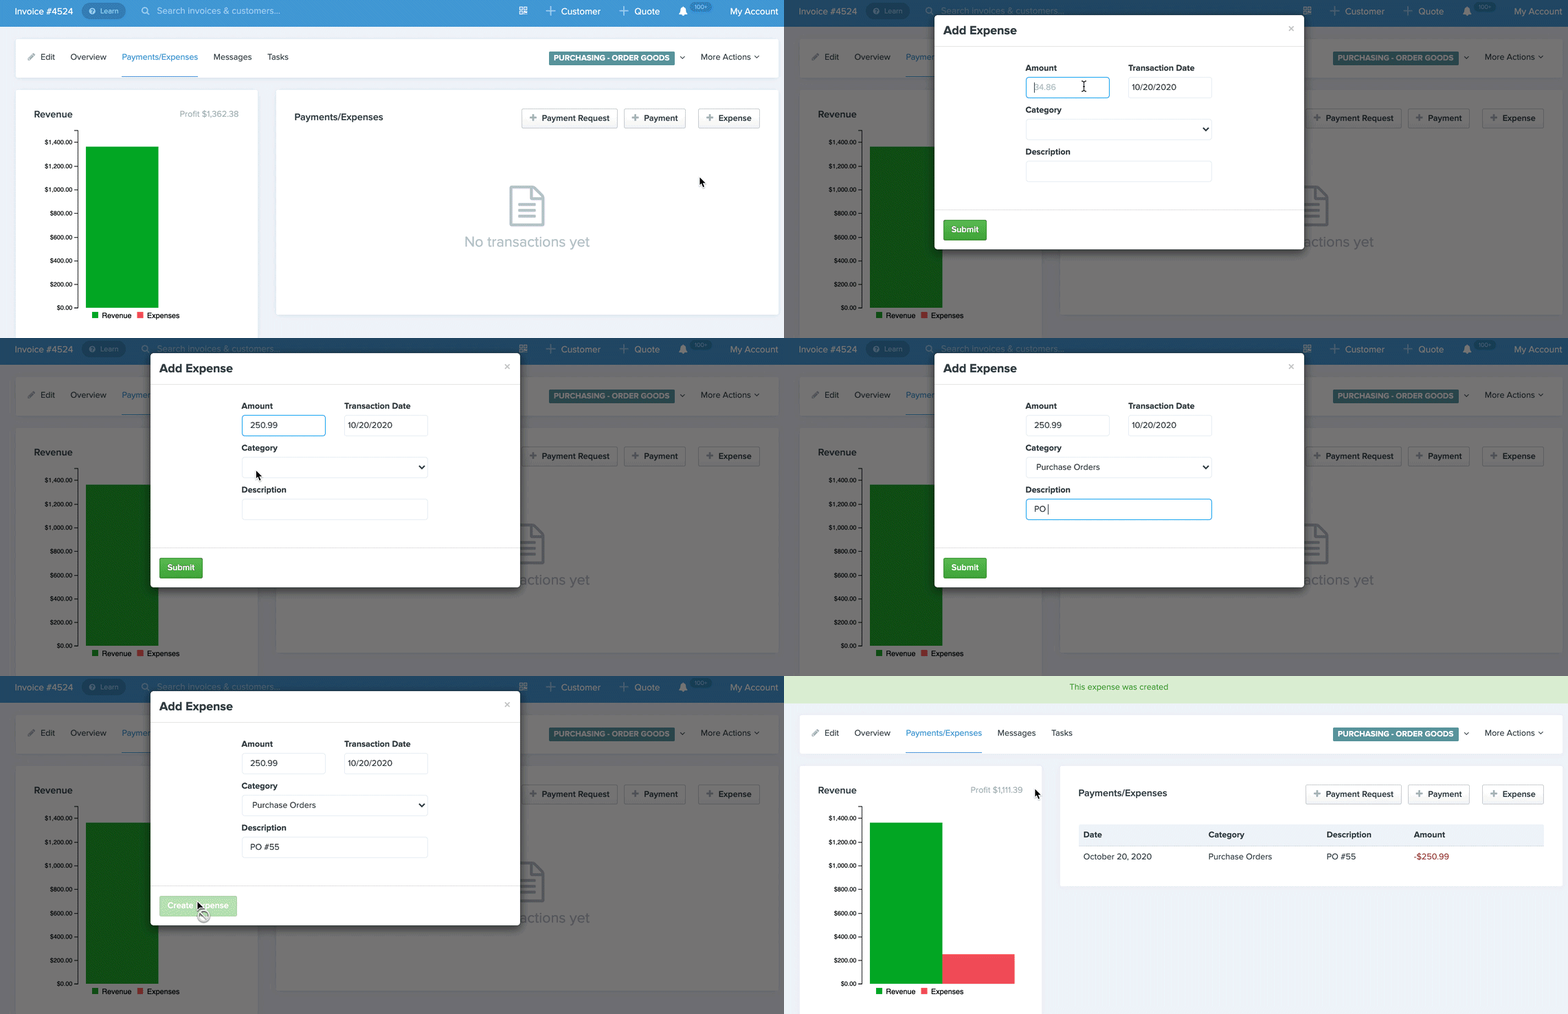
To track expenses on a per-job basis, from a job, simply click "Payments/Expenses" > "+ Expense"
Once there, a modal will pop up asking you for the expense amount, date, category, and any description you'd like to provide.
After this information is submitted, the job will break down your revenue vs. your expenses and provide you the profit amount for the job!

Tracking high-level expenses
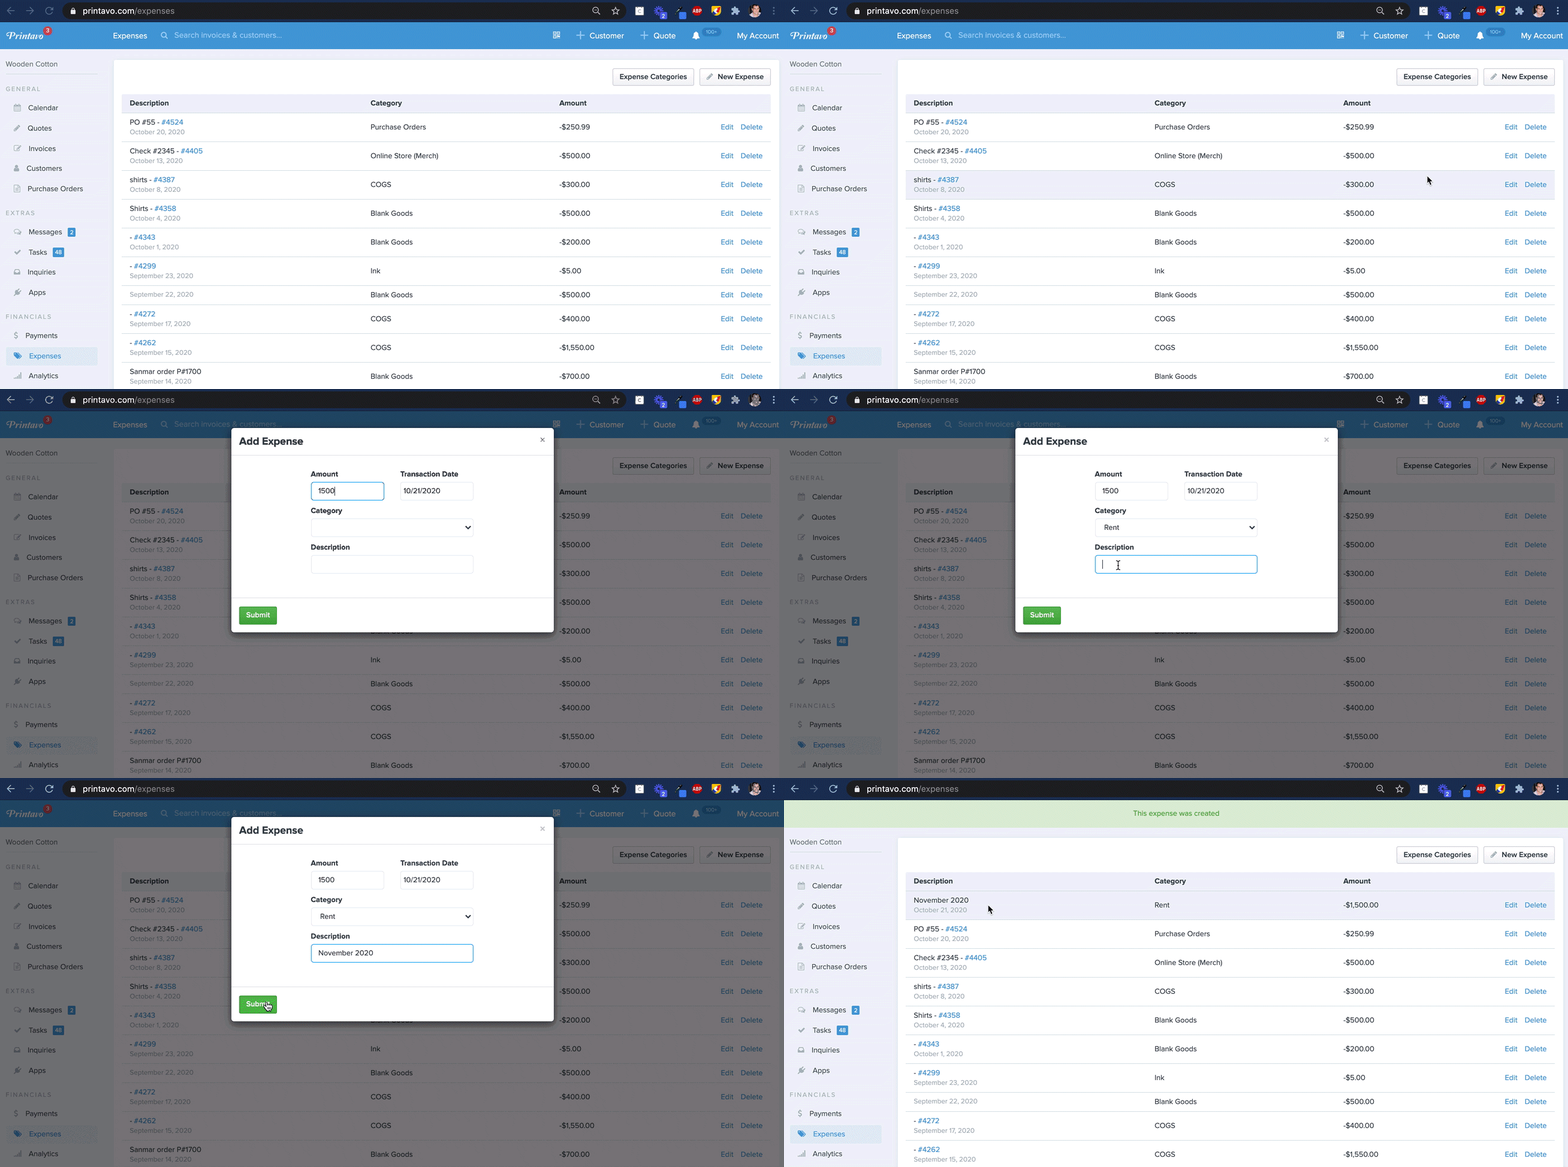
To track overhead expenses that are not related to a job (e.g., labor, bills, etc.), click on the Expenses option on the left, vertical banner. From here, you can click on the "New Expense" button to enter the expense amount, date, category, and any description you'd like to provide.
Note: The Expenses tab will display all tracked expenses, but can only log non-job-specific expenses.

Native expense analytics
If your shop stays on top of entering expenses into Printavo, you can utilize Printavo's built-in analytics to view reports for:
- Revenue and Expenses
- Expenses Breakdown

NEXT: 6.7 Exporting Data for Custom Analysis
PREVIOUS: 6.5 Converting More Sales
Comments
Please sign in to leave a comment.